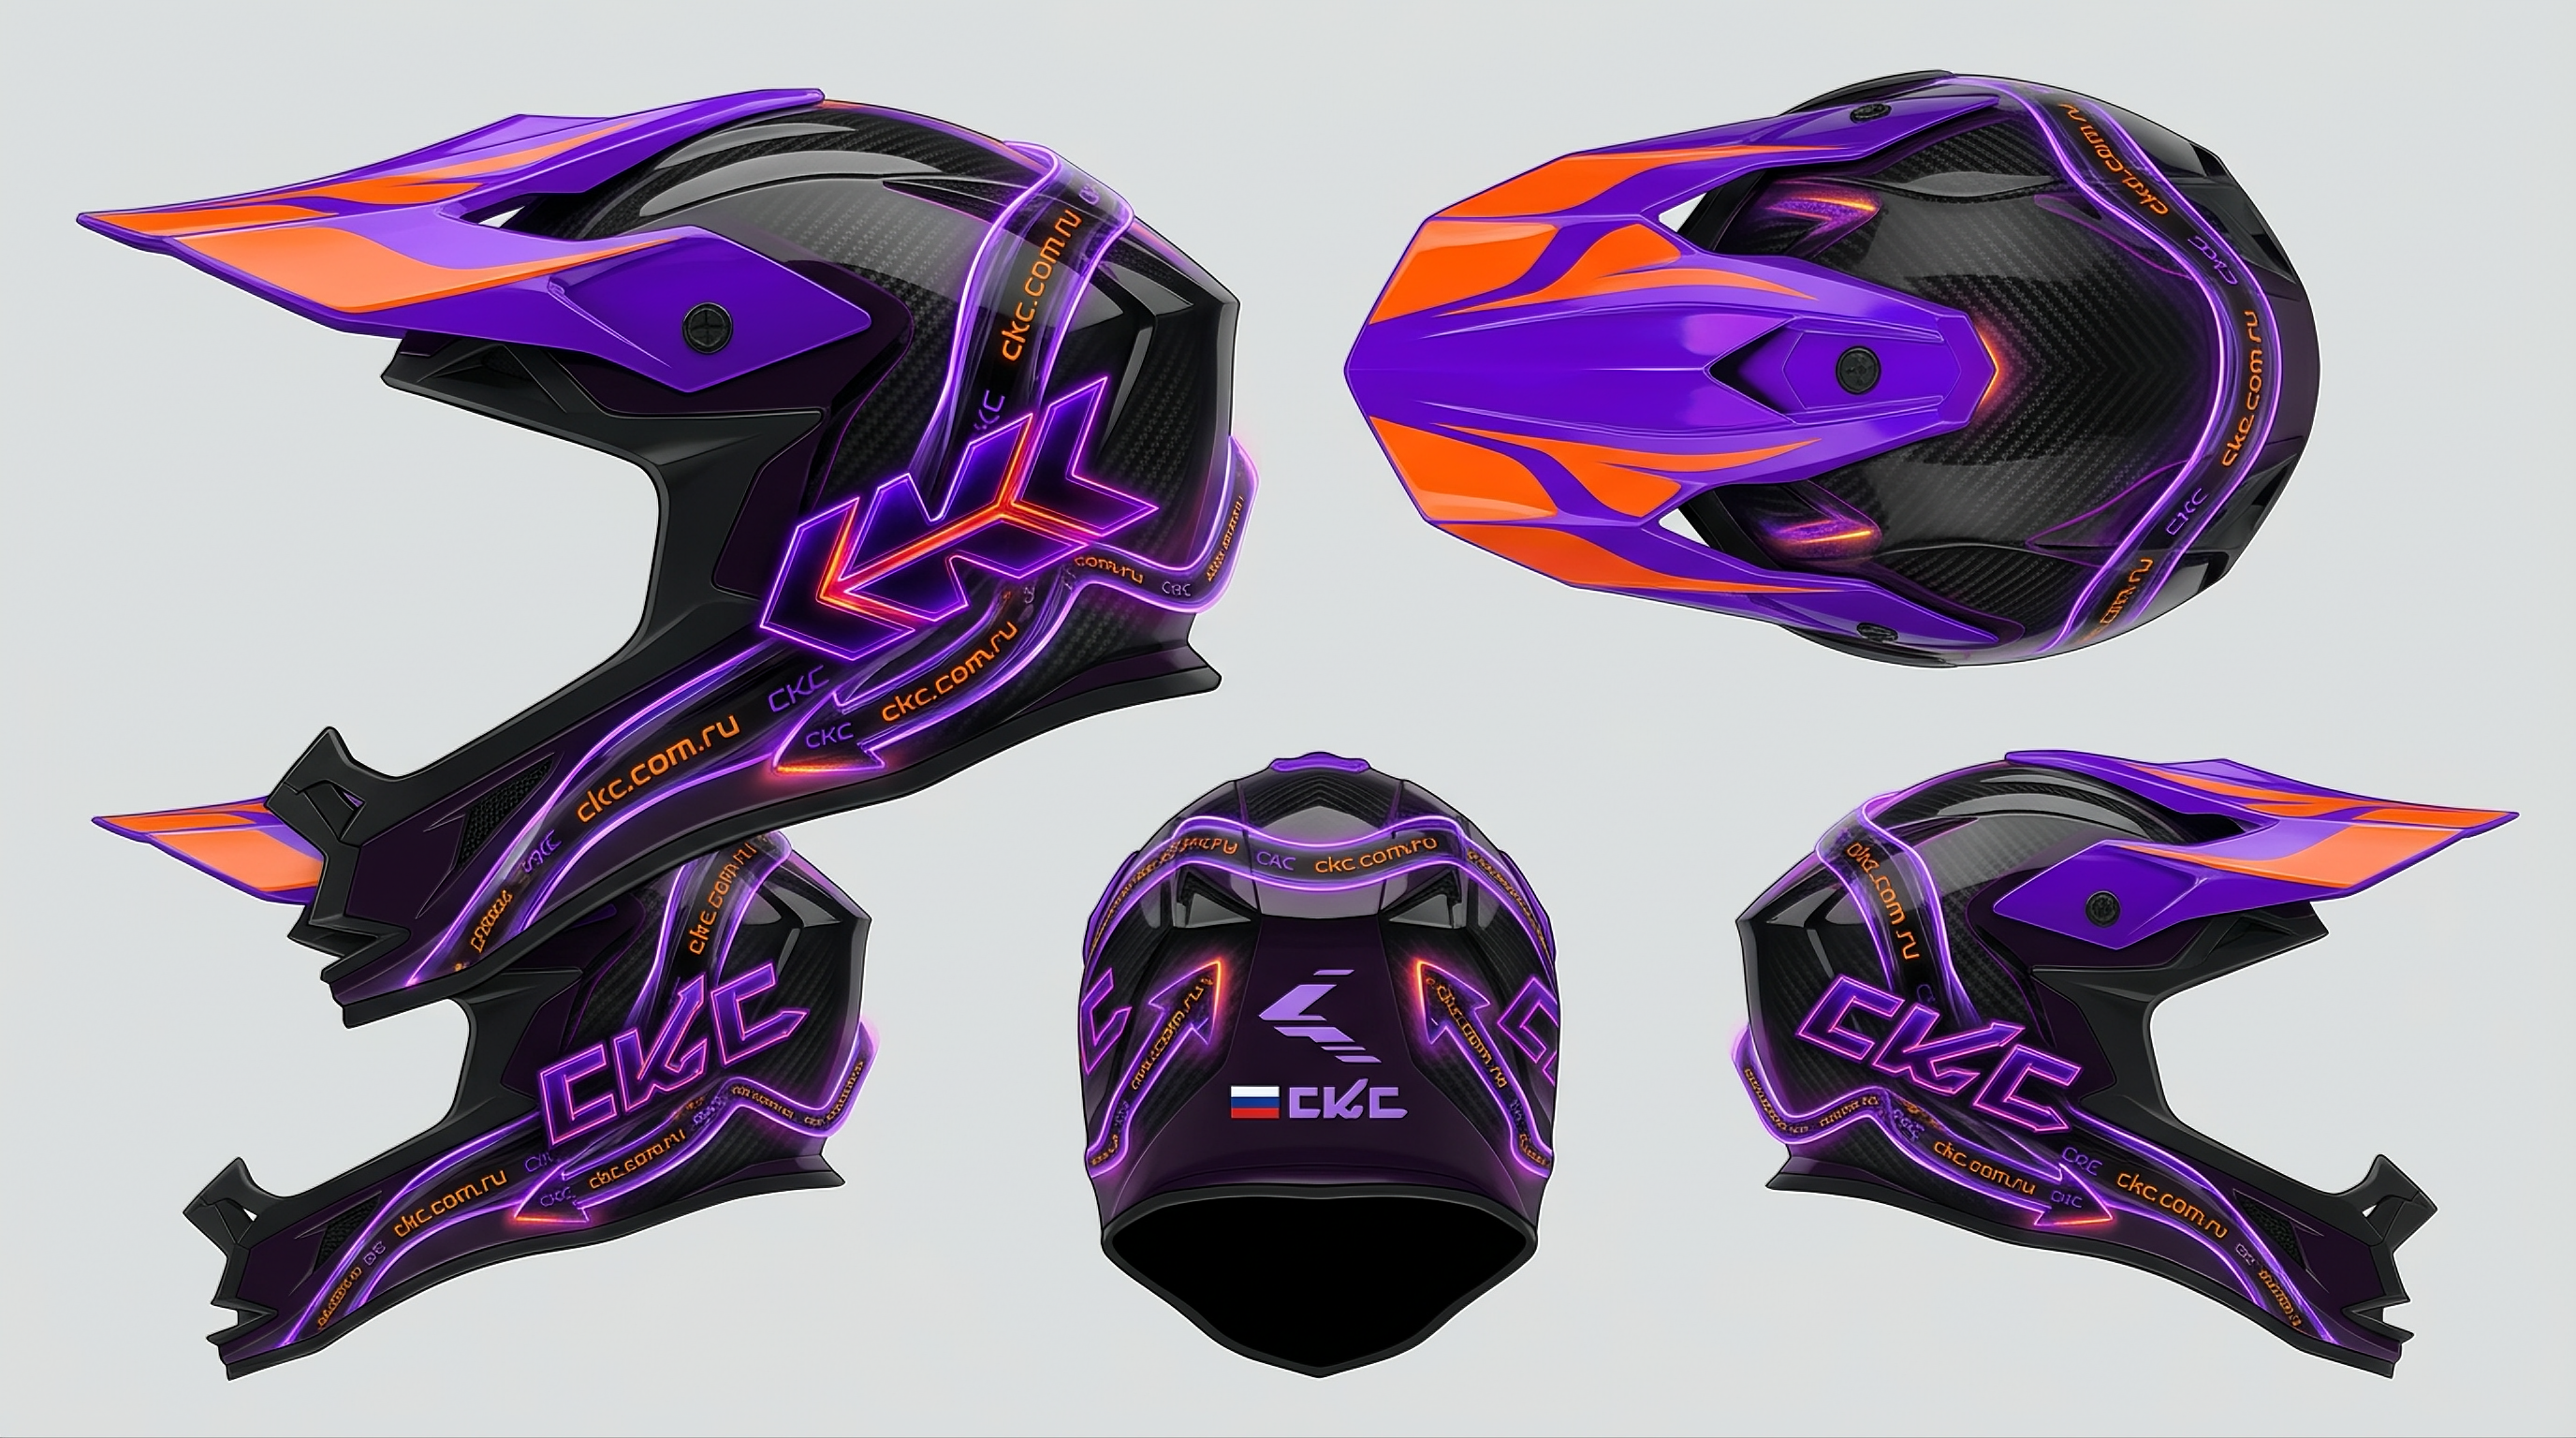
Image - 2026-08-27 18:26
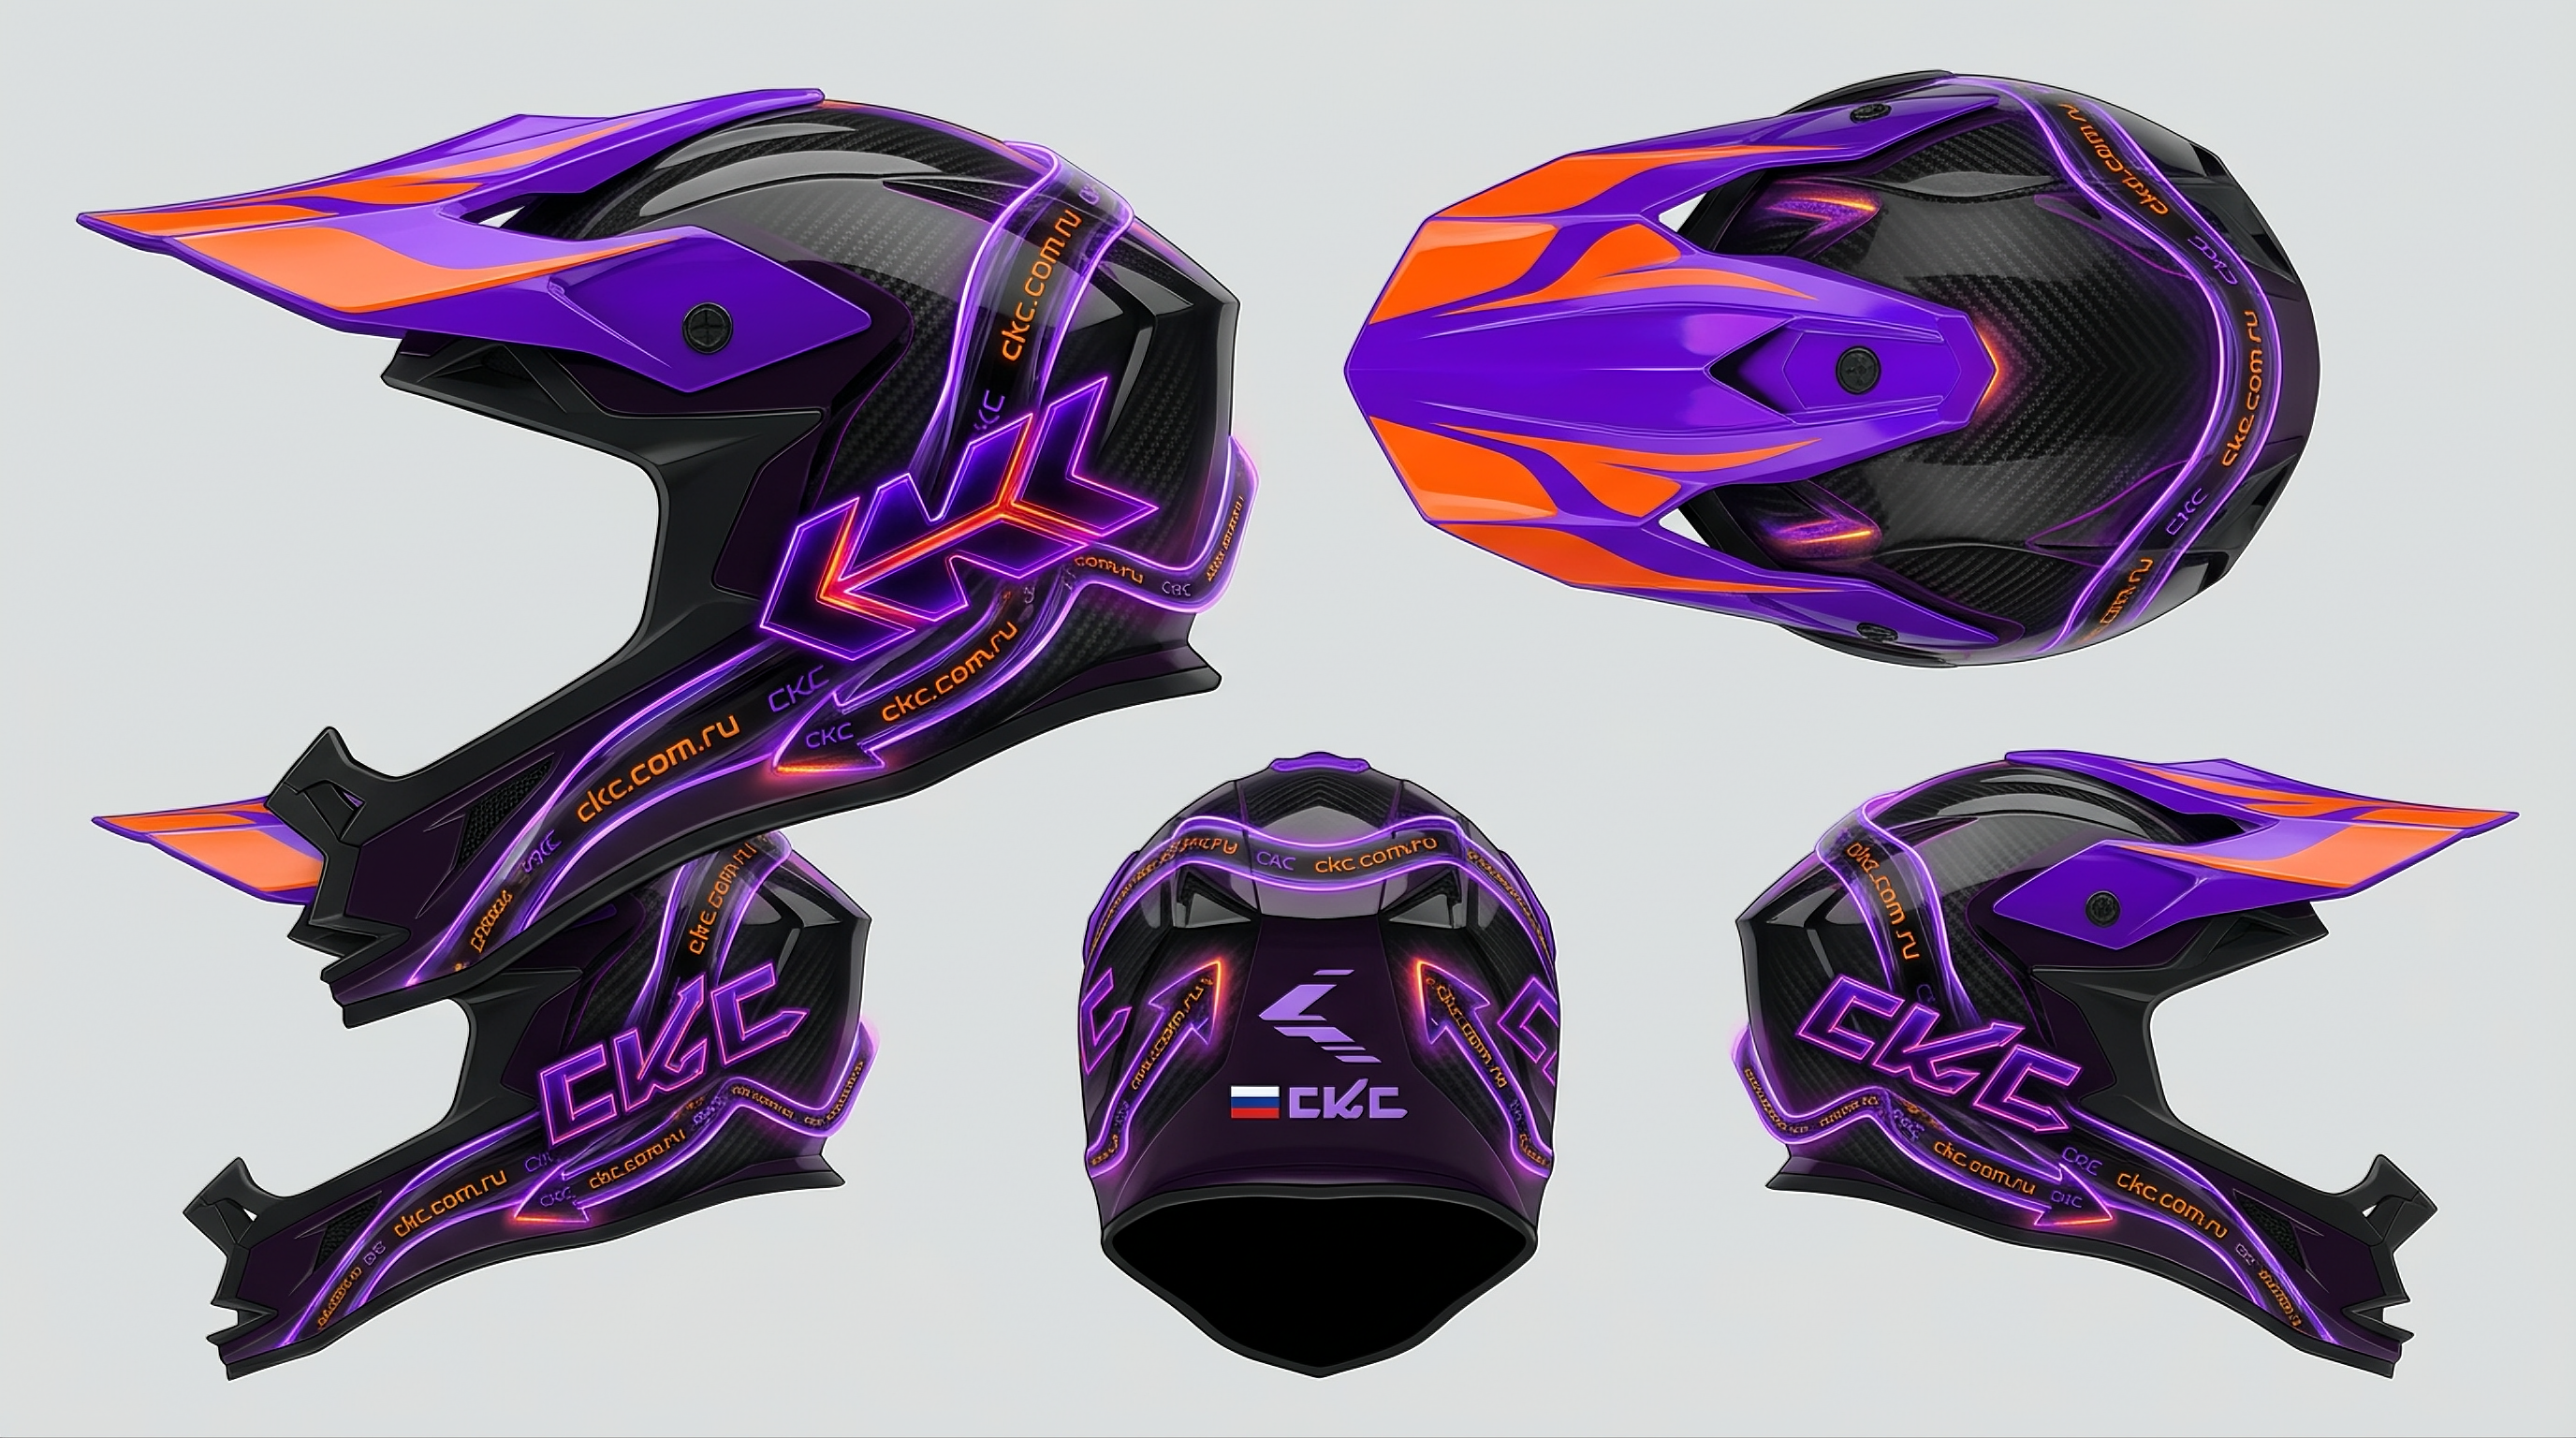
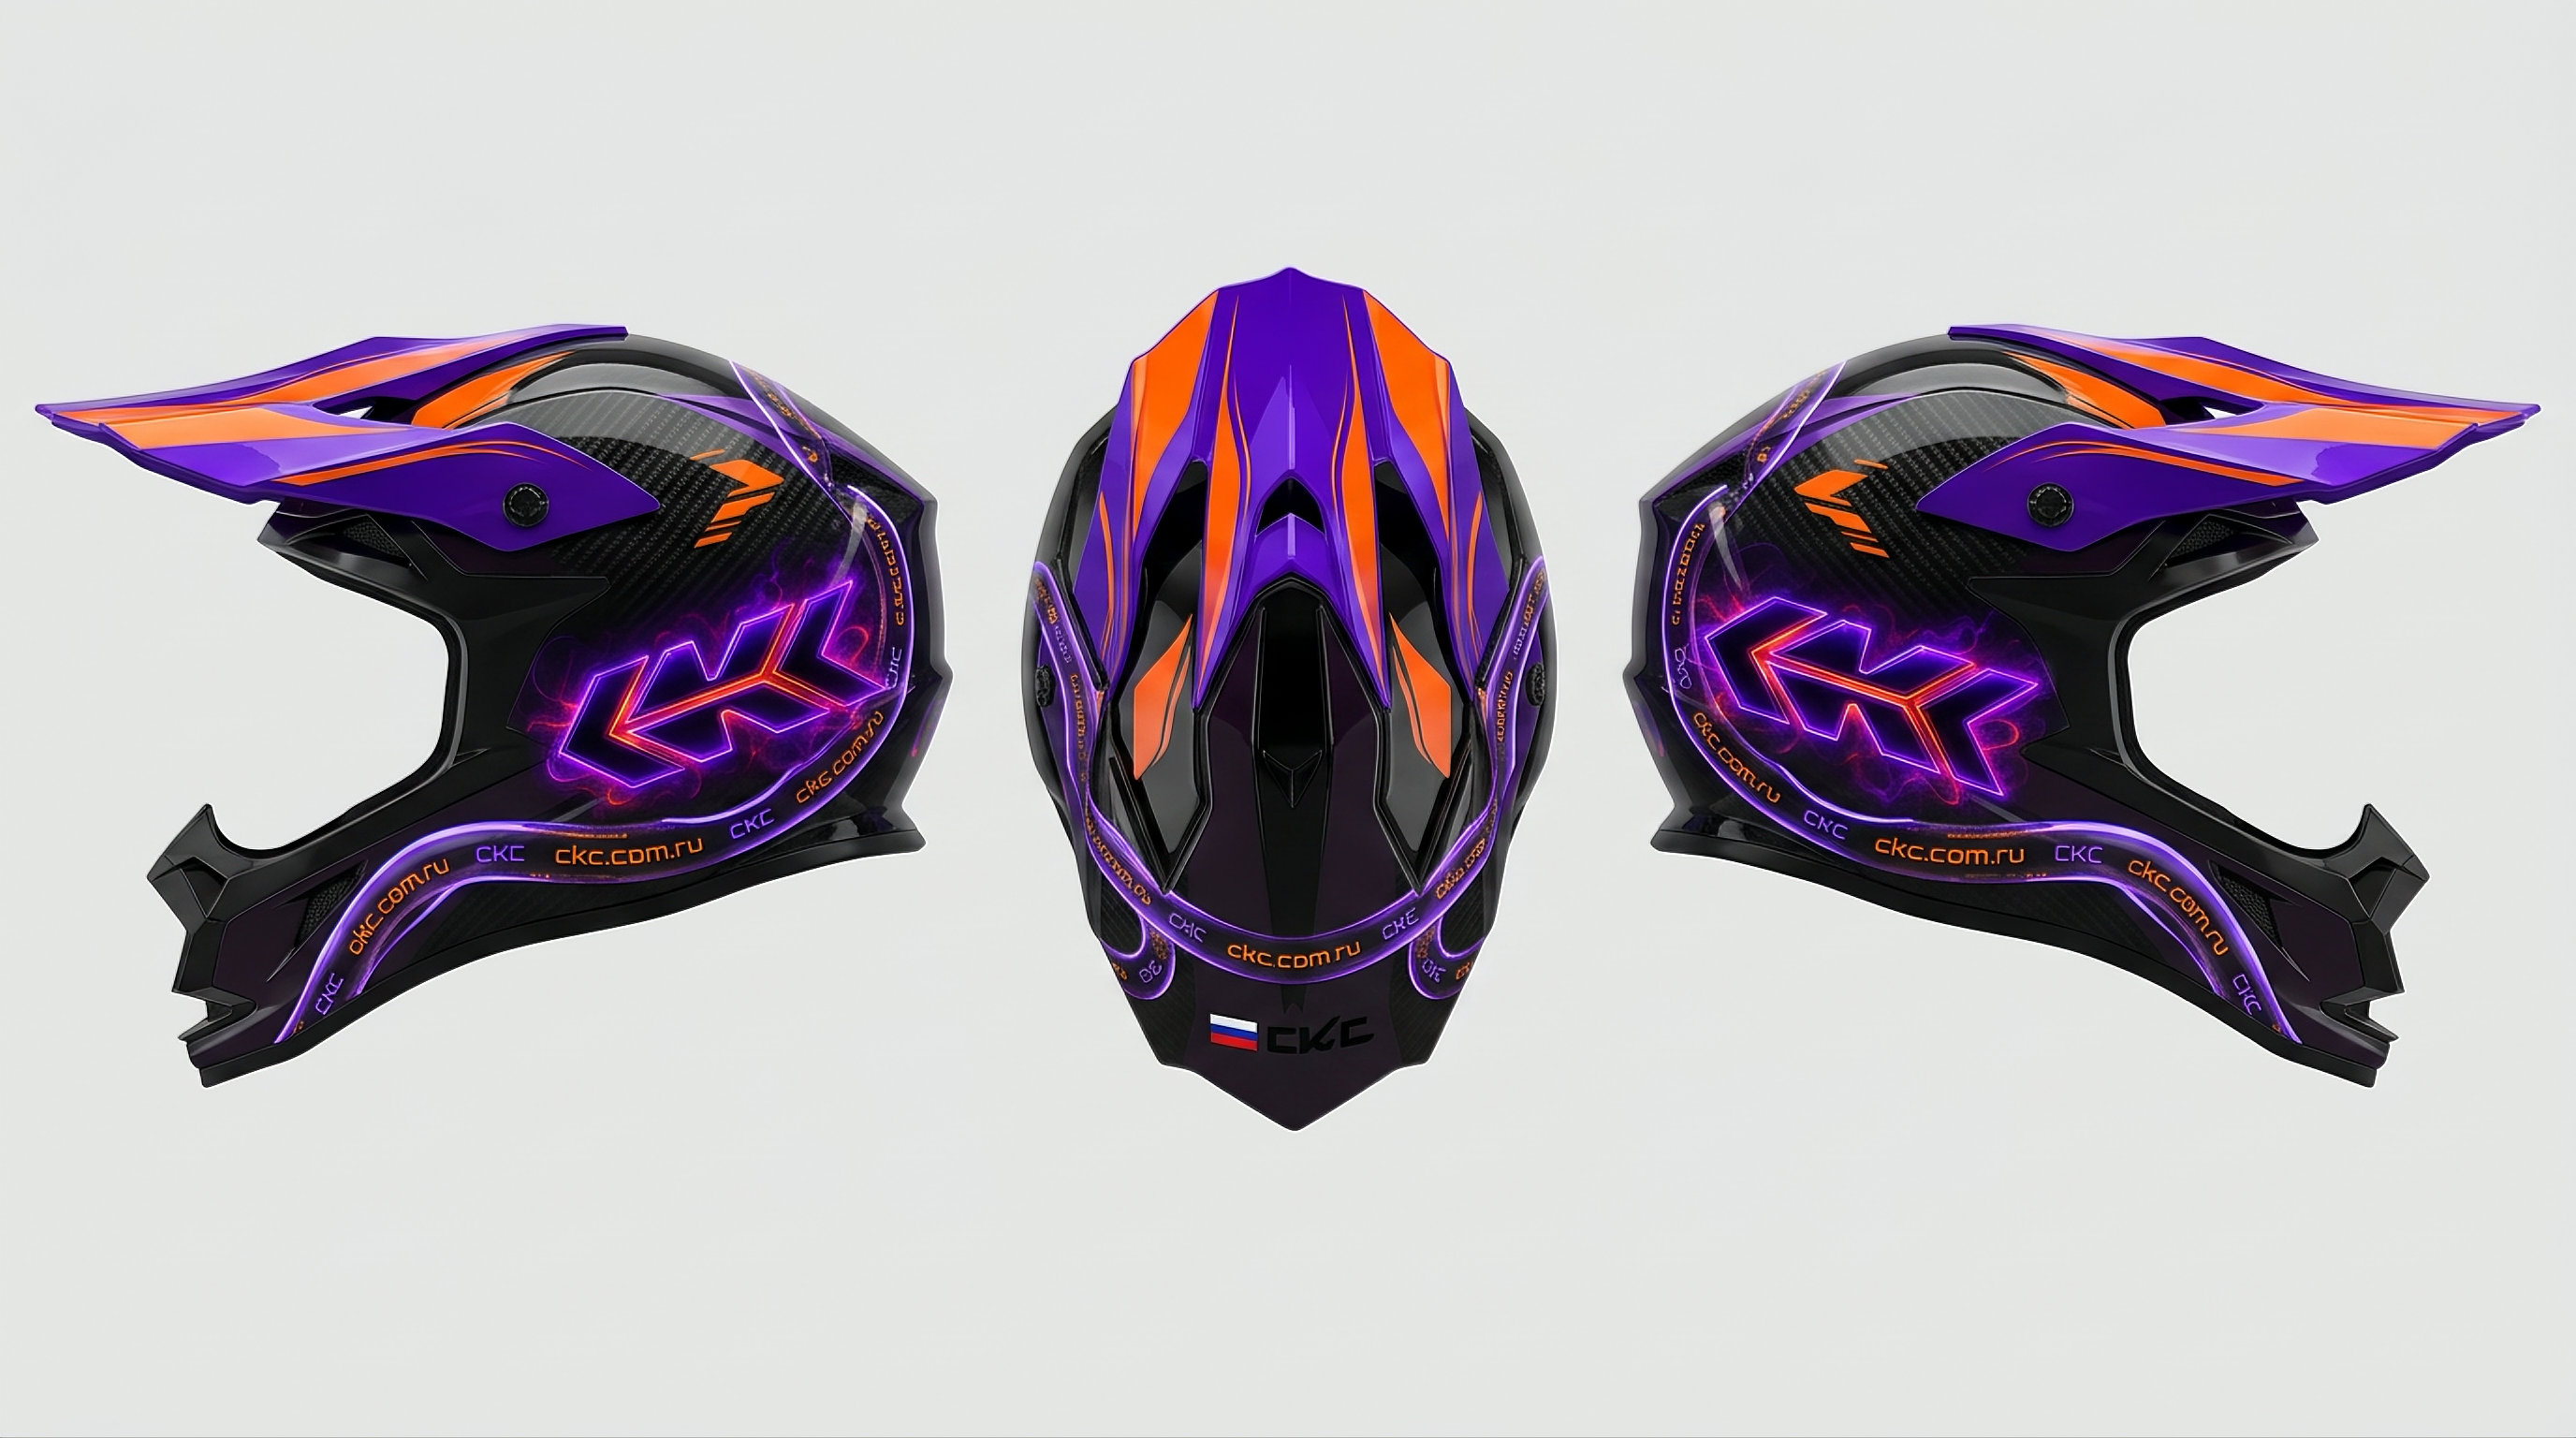
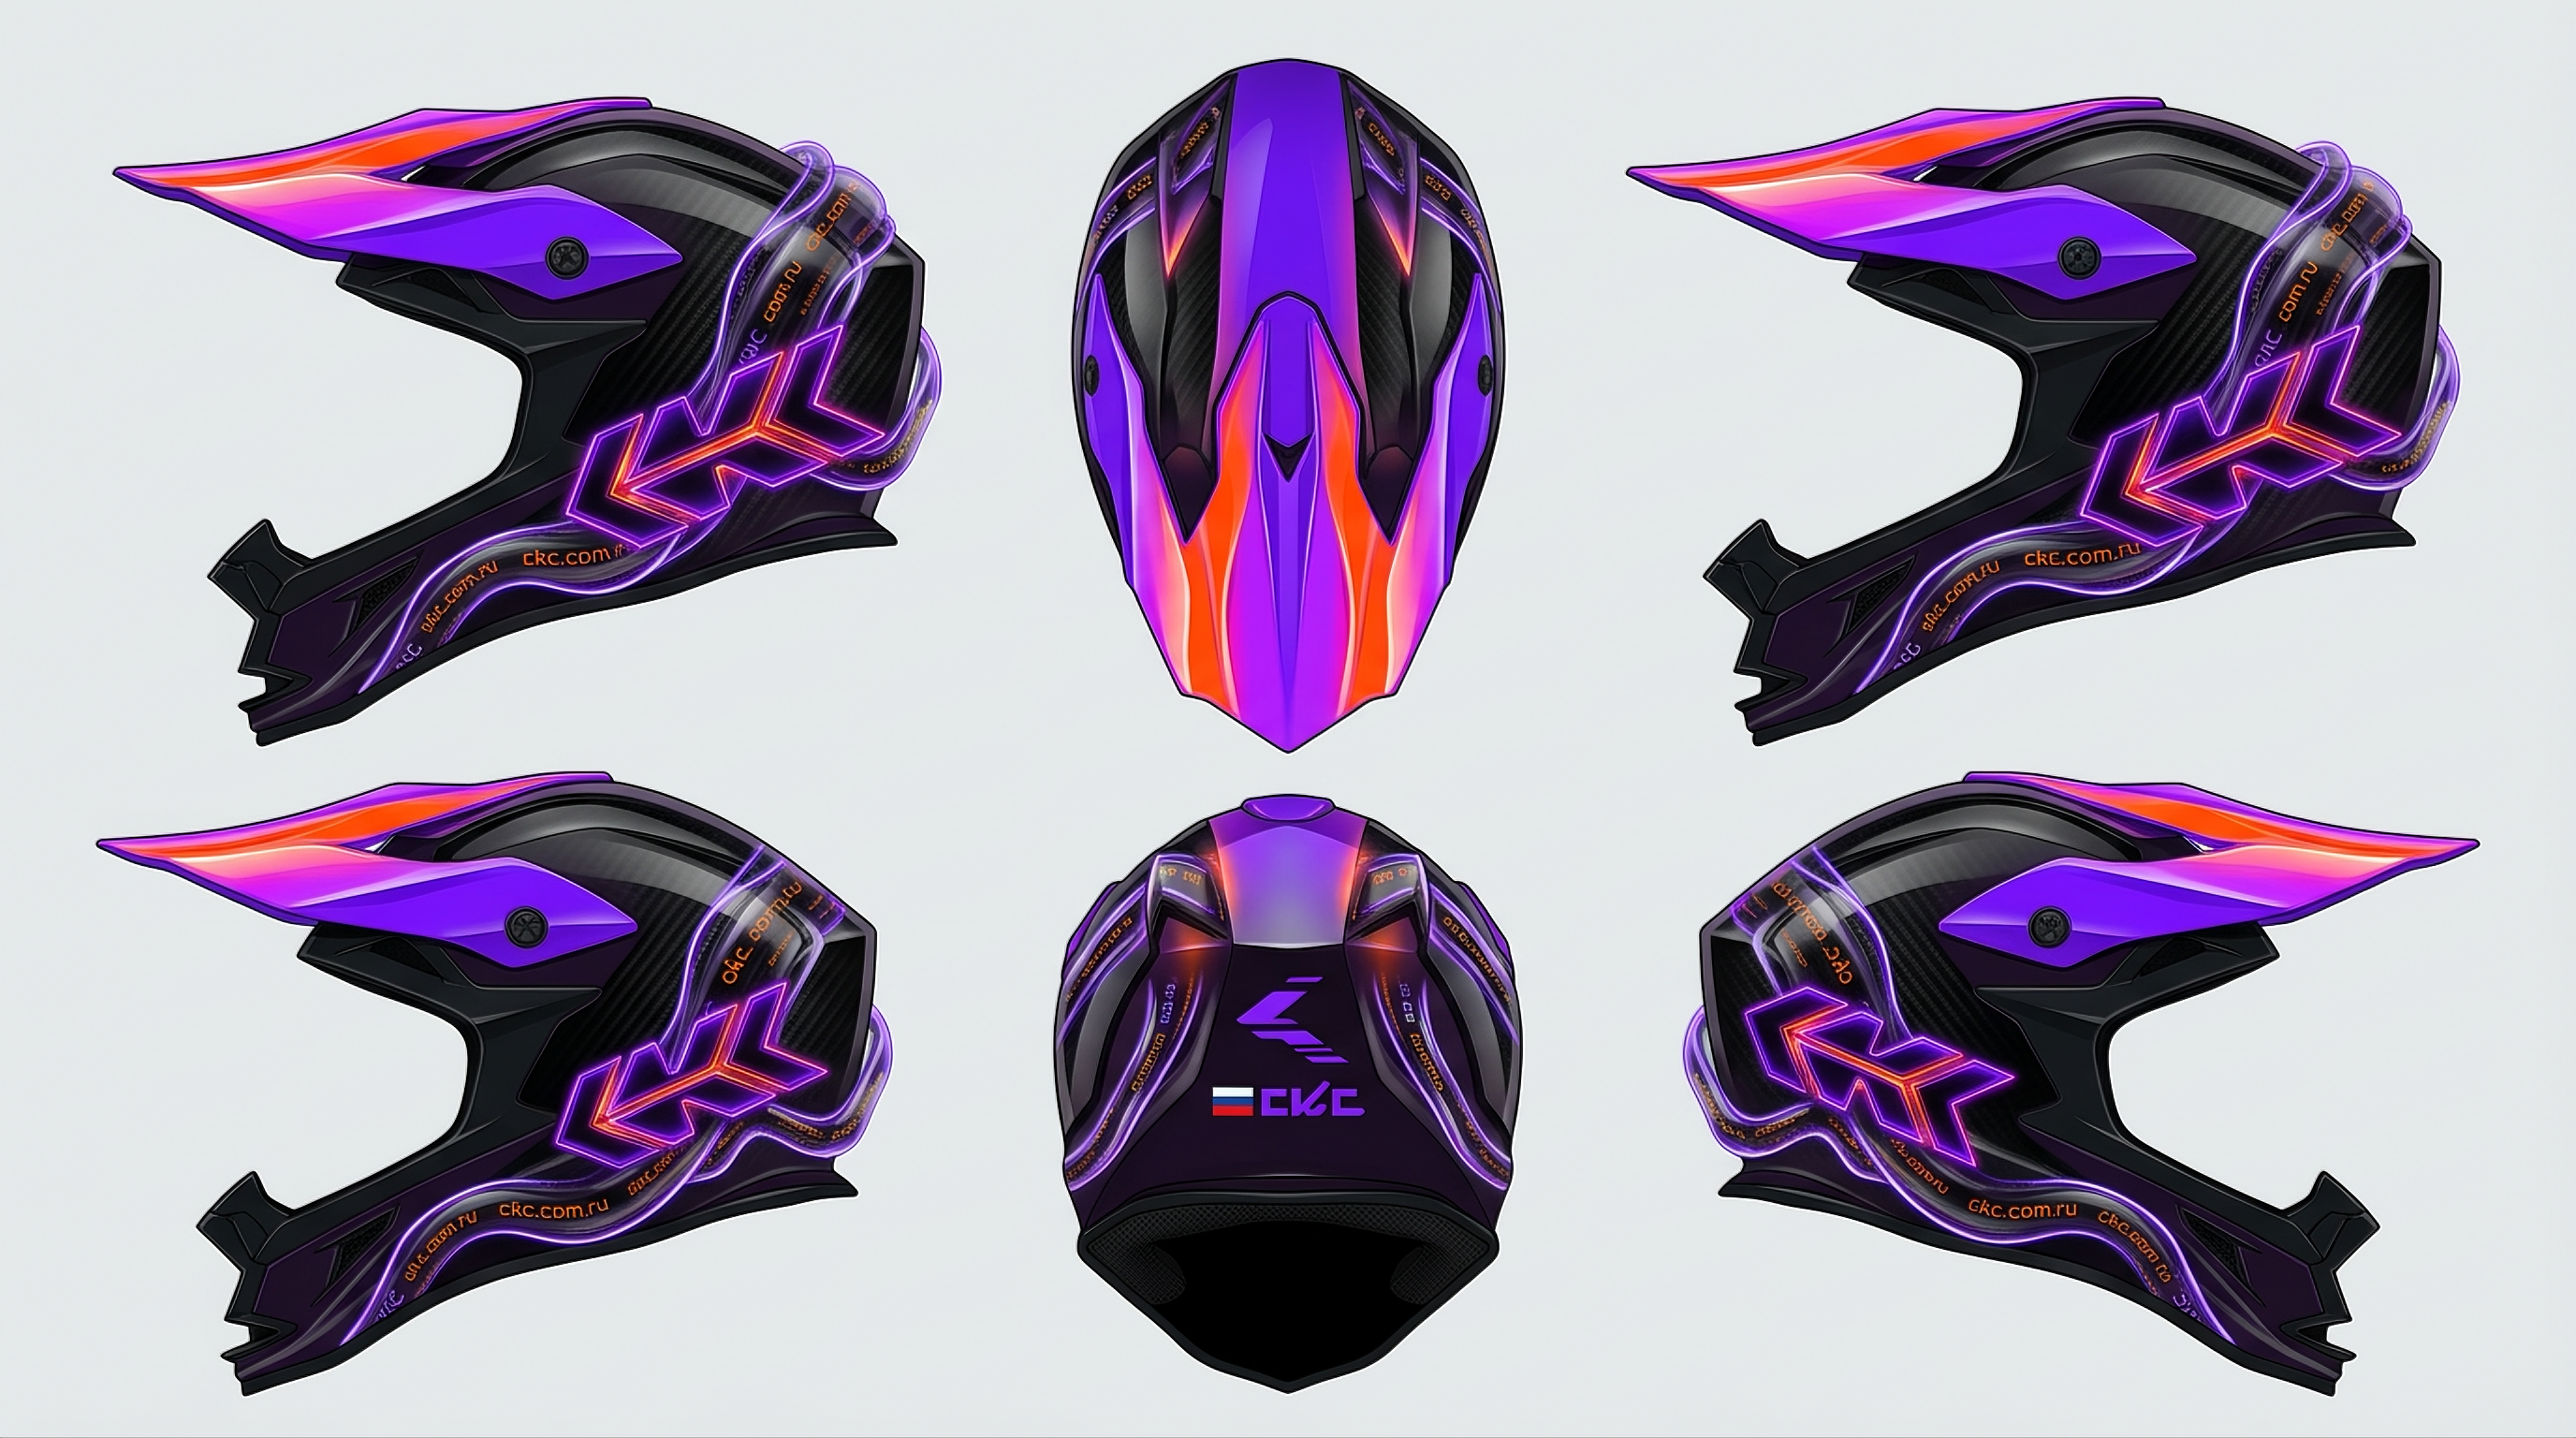
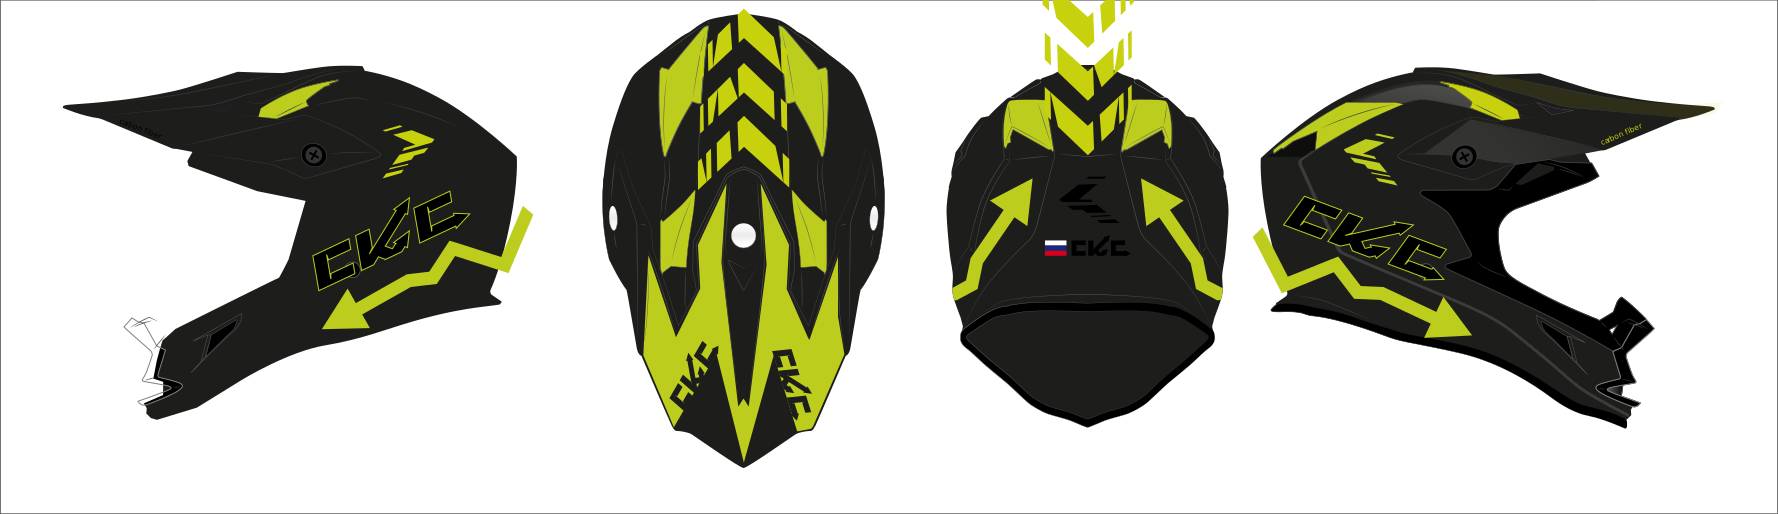
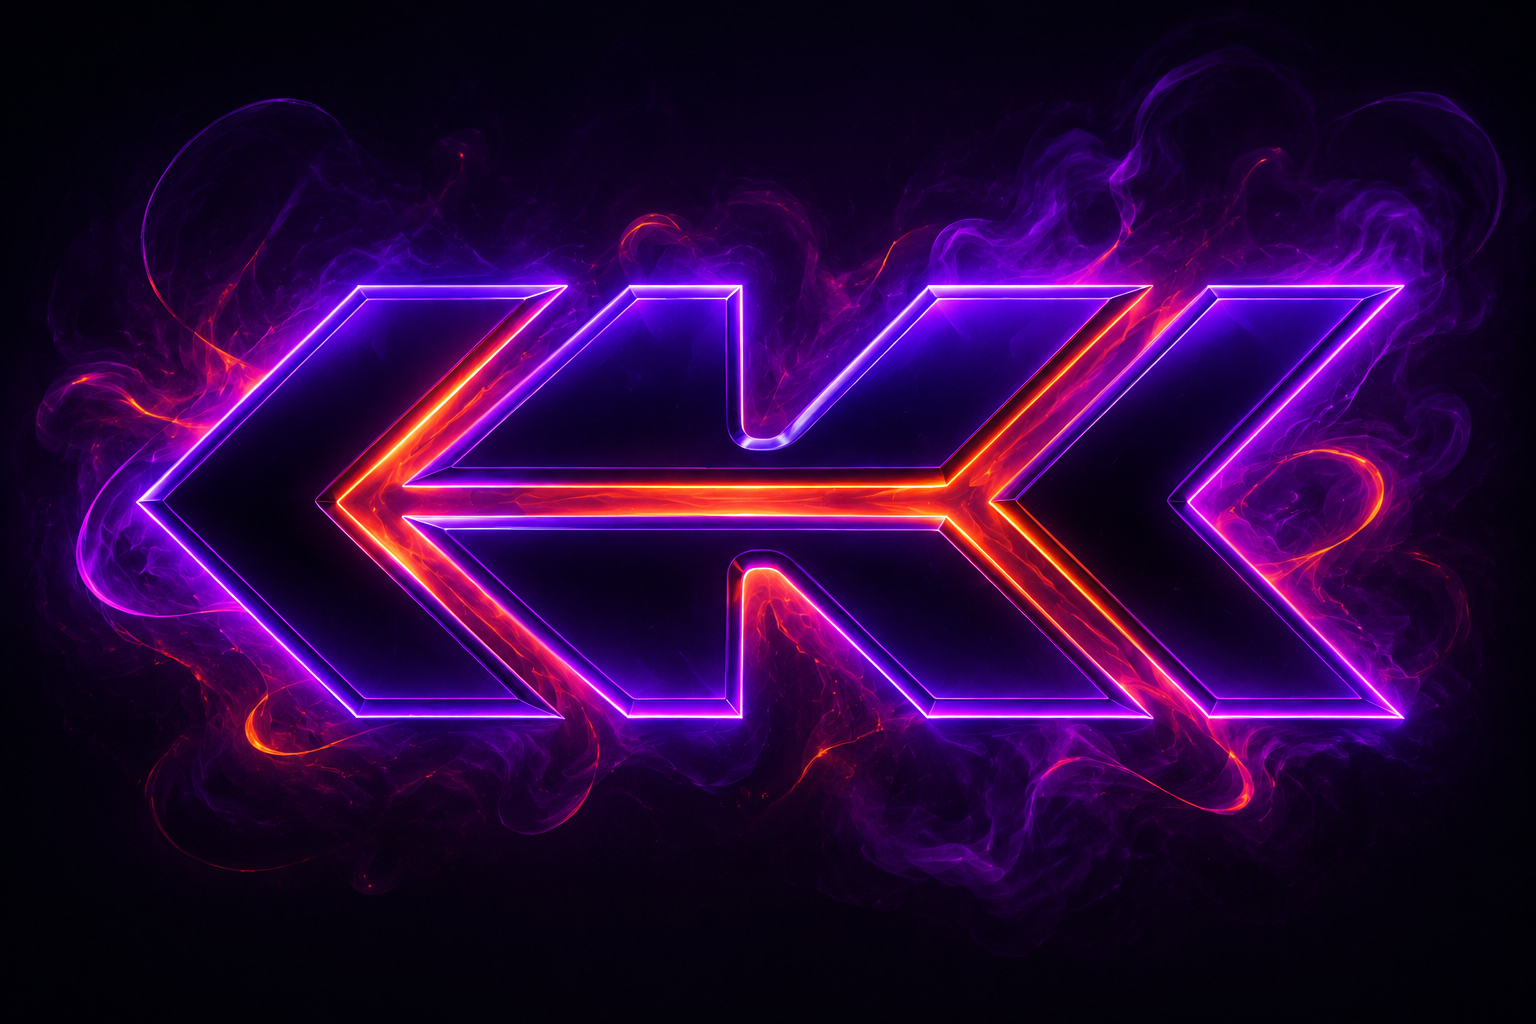
Create one professional, ultra-high-resolution industrial design board for a completely new CKC snowmobile helmet graphic. INPUT IMAGE ROLES AND PRIORITY IMAGE 1 — DNA GRAPHIC REFERENCE Use Image 1 as the absolute visual reference for the main DNA/data-ribbon graphic. Transfer this graphic language onto the helmet as accurately as possible: * thick translucent glass-like flowing strands; * black or deep-violet transparent inner core; * bright ultraviolet and electric-violet illuminated edges; * Signal Orange internal text and technical micro-markings; * layered depth, refraction, reflections and controlled neon glow; * soft violet atmospheric light surrounding the strand. Do not simplify the DNA ribbon into thin lines, lightning, flames, veins or a small decorative web. The DNA ribbon must be one of the largest and most important elements of the helmet design. IMAGE 2 — EXACT LOGO REFERENCE Use Image 2 as the absolute reference for the CKC logo. The logo must be transferred as one complete finished graphic. Preserve exactly: * the original connected CKC geometry; * the proportions and horizontal construction; * the left angular C; * the central K with its clearly visible horizontal middle bar and diagonal arms; * the right angular C; * the deep-violet glossy inner surfaces; * the electric-violet neon outline; * the hot-orange internal illuminated channels; * the restrained purple-orange glow and smoke surrounding the emblem. Do not redraw, retype, reinterpret, fragment, mirror, stretch or simplify the logo. Do not convert it into three arrows, three chevrons, CCC or KKK. Treat the logo from Image 2 as a finished flattened decal that may only be uniformly scaled, perspective-matched and carefully masked to the helmet surface. IMAGE 3 — LOCKED HELMET BASE Use the file named “Пробник” as the absolute and locked construction reference for the helmet. Preserve exactly: * the complete helmet silhouette; * shell geometry and proportions; * peak/visor shape; * chin guard; * eye opening; * ventilation openings; * screws and mounting points; * all panel boundaries; * top, side and rear construction; * every technical and functional detail; * the original four-view arrangement. Do not redesign, simplify, enlarge, remove or invent any helmet component. Remove the entire old black and acid-green graphic design from Image 3. The old arrows, old CKC marks, green panels, inscriptions and decorative elements must not remain. OUTPUT FORMAT Create one extra-wide professional design board with four aligned orthographic views in exactly this order: 1. Left side profile facing left. 2. Top view. 3. Rear view. 4. Right side profile facing right. All four views must show the exact same helmet and one logically continuous design. Use a clean pale-grey or white studio background. No captions, annotations, arrows, measurements, borders or presentation text. NEW COLOR SYSTEM Use the following palette: * Technical Black — #101317; * Deep Aubergine — #261338; * Electric Violet — #722BFF; * Neon Violet — #6D28FF; * Ultraviolet Magenta — #D53CFF; * Signal Orange — #FF5A1F; * Hot Orange — #FF7A00. The helmet must remain approximately 55–65% black or near-black. Use glossy black and glossy black-carbon surfaces as the main base. Use violet and orange as intense luminous graphic elements. The result must feel premium, aggressive, futuristic and expensive — not like a generic gaming helmet. BRIGHT PEAK REQUIREMENT The client specifically requires a bright peak. The peak must not be predominantly black. Make the visible peak surfaces vivid and highly noticeable: * main glossy Electric Violet or deep ultraviolet base; * strong Signal Orange graphic zones or flowing orange highlights; * controlled violet-to-orange transitions; * high-gloss lacquer and clear reflections. The peak design must remain consistent between the left, top and right views. Do not change the physical shape of the peak. MAIN DNA RIBBON Transfer the DNA/data-ribbon design from Image 1 onto the helmet as accurately as possible. The ribbon must be extremely large. Its visible thickness on the side views should be only slightly smaller than the height of the large CKC logo placed on the side panel — approximately 75–90% of the logo height. The ribbon must be thick enough for the internal inscriptions to remain clearly readable on the final multi-view board. Use only one or two dominant coherent strands per side. Do not create numerous thin tangled wires. SIDE PATH On both side profiles: * begin the ribbon near the lower front chin section; * lead it diagonally through the main side shell; * curve it around the logo without covering the logo; * continue upward toward the crown and rear; * maintain the same visual direction and hierarchy on both sides. The ribbon must feel integrated into the helmet rather than placed randomly on top. ENTERING AND EXITING THE HELMET Create a convincing optical illusion that the DNA ribbon enters the helmet shell and later exits from it. At two or three selected points on each side: * make the ribbon approach an existing panel boundary or ventilation opening; * gradually reduce its visible thickness; * hide it completely beneath the existing shell panel; * add a restrained violet-orange subsurface glow inside the seam; * allow the ribbon to emerge from another existing panel boundary; * restore its full glass-like volume after it exits. Use correct occlusion, contact shadows, reflections and rim light. Do not create new holes, new vents or physical external cables. The effect must remain a printed or painted hyper-realistic optical illusion integrated into the glossy lacquer. DNA RIBBON TEXT The only readable text allowed inside the DNA ribbon is: “CKC” and “ckc.com.ru” Spell them exactly: * uppercase logo text: C–K–C; * website: c–k–c dot c–o–m dot r–u. Place several large readable instances of “ckc.com.ru” along the central dark core of the thick ribbon. The text must follow the curvature and perspective of the strand. Use narrow futuristic monospaced typography in Signal Orange. Add several smaller “CKC” inscriptions in violet or orange. Fewer accurate inscriptions are better than numerous distorted ones. Do not use: * SKS; * SKC; * CKK; * random numbers; * fake code; * malformed URLs; * invented letters or unreadable pseudo-text. Small secondary technical details may consist only of dots, dashes and rectangular ticks. LOGO PLACEMENT Place one large complete neon CKC logo from Image 2 on the central side panel of the left view. Place the same complete logo on the central side panel of the right view. Both logos must: * have identical geometry and scale; * remain correctly oriented; * remain fully visible; * not be mirrored into another symbol; * not be covered by the DNA ribbon; * follow the surface perspective of the helmet; * retain the violet-orange neon material and restrained smoke effect from Image 2. Place one smaller complete CKC logo on the rear of the helmet. Do not place the logo on the top view unless it is naturally visible as part of another view. REAR VIEW AND RUSSIAN FLAG Use the rear view and flag placement from Image 3 as the positional reference. Preserve one small Russian tricolor flag on the rear: * horizontal white stripe; * horizontal blue stripe; * horizontal red stripe; * correct proportions; * clean straight edges; * discreet scale. Place the complete smaller CKC logo next to or directly above the flag. The logo and flag must form one balanced rear branding zone. Do not allow the DNA ribbon to cover the logo, flag, vents or structural openings. The thick DNA ribbon may curve around the rear branding zone and visually enter or exit beneath an existing rear panel. SURFACE AND FINISH Use premium glossy materials throughout: * glossy Technical Black shell; * visible but controlled black-carbon weave; * glossy deep-aubergine areas; * high-gloss Electric Violet; * selective violet-to-magenta interference; * high-gloss Signal Orange details; * realistic reflections and lacquer depth. The neon effect must feel printed beneath a clear glossy protective layer. Do not make the helmet look self-illuminated like an electronic screen. Use controlled neon reflections rather than excessive bloom. CONTINUITY BETWEEN VIEWS The DNA ribbon must follow one believable continuous route around the helmet. A strand visible on the left side must continue logically onto the top or rear. The right-side design must correspond logically to the same continuous system. The bright peak colors, logo scale, ribbon thickness, panel transitions and rear branding must match between all views. STRICT PRESERVATION REQUIREMENTS Do not modify: * helmet silhouette; * helmet proportions; * peak geometry; * vents; * panel seams; * screws; * chin guard; * eye opening; * mounting hardware; * rear construction; * number or order of views. Do not add: * goggles; * visor; * external wires; * physical tubes; * new ventilation holes; * new attachments; * additional logos; * slogans; * random symbols; * watermarks. FINAL VISUAL TARGET A premium glossy CKC snowmobile helmet with a predominantly black base, a bright violet-orange peak, two exact neon CKC side logos, a smaller rear CKC logo with the Russian flag, and one extremely large translucent violet-orange DNA/data ribbon wrapping continuously around the shell. The DNA ribbon must look as though it repeatedly enters the helmet and emerges from it. Its internal “CKC” and “ckc.com.ru” inscriptions must remain clearly readable. The final result must be sharp, technically precise, production-oriented and suitable for presentation to a helmet manufacturer.
Free to start · Generate videos and images with AI in seconds
More from this creator

More L images
См. все →